What is a workspace?
Workspaces allow you to organise Activities and admin users within your Citizen Space site. With Citizen Space Workspaces, you add a user as either a Site Admin or a Site Member and then refine user access at the Workspace and Activity levels.
- Workspace Admin: can manage workspace permissions, edit all workspace activities and create new ones.
- Workspace Member: can view all workspace activities and create new ones.
Citizen Space admin users can belong to multiple Workspaces
This means users can work across different department areas and teams, ensuring that Citizen Space reflects the collaborative work your organisation is doing.
Activities can have multiple admins
Admin responsibility for activities can now be shared between users. Each activity will still have a single owner, but you can add multiple admins with the same capabilities to an activity. This makes it easier for colleagues to create and manage activities together for more strategic collaboration and oversight.
How to:
- Add a Workspace
- Manage Workspace user access
- Change a user's Workspace role
- Add an activity to a Workspace
- Change an activity to a different Workspace
How to add a workspace
-
Go to Site > Settings.

-
Select Workspaces.

-
Select ‘Add Workspace’.

-
Enter title and description for the workspace and ‘Add’.

Important note
Whatever you enter first as the Workspace title will set the URL ending for that Workspace, so you may want to enter something abbreviated initially (such as an acronym) to keep your URLs as short as possible - you can always then rename the title something longer afterwards once the URL is set.
How to manage Workspace user access
-
Go to Site > Settings.

-
Select Workspaces.

-
Find the relevant Workspace in the list, and select the link showing the number of workspace members.

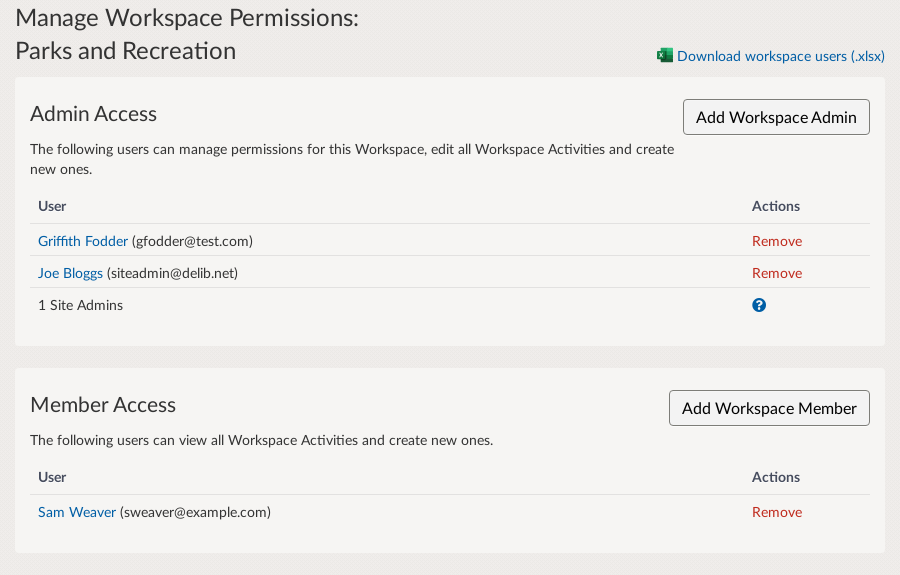
- On the 'Manage Workspace Permissions' page, you can view all current user access, with a section for Workspace Admins and a section for Workspace Members.
- To add more users to the Workspace, select either 'Add Workspace Admin' or 'Add Workspace Member' depending on the level of access needed.
- On the pop-up screen, search for the user and select 'Add'.

You can also assign users to Workspaces from an individual user's profile. Refer to how to manage internal users for more information.
Change a user's Workspace role
-
Go to Site > Settings.

-
Select Workspaces.

-
Find the relevant Workspace in the list, and select the link showing the number of workspace members.

- On the 'Manage Workspace Permissions' page, you can view all current user access, with a section for Workspace Admins and a section for Workspace Members.
- To change a user's role, select either 'Add Workspace Admin' or 'Add Workspace Member' depending on the level of access needed. Once added, this new assigned role overrides their old one (their name will now appear in the newly assigned section listing).
- On the pop-up screen, search for the user and select 'Add'.

You can also change a user's Workspace role from an individual user's profile. Refer to how to manage internal users for more information.
Add an activity to a Workspace
-
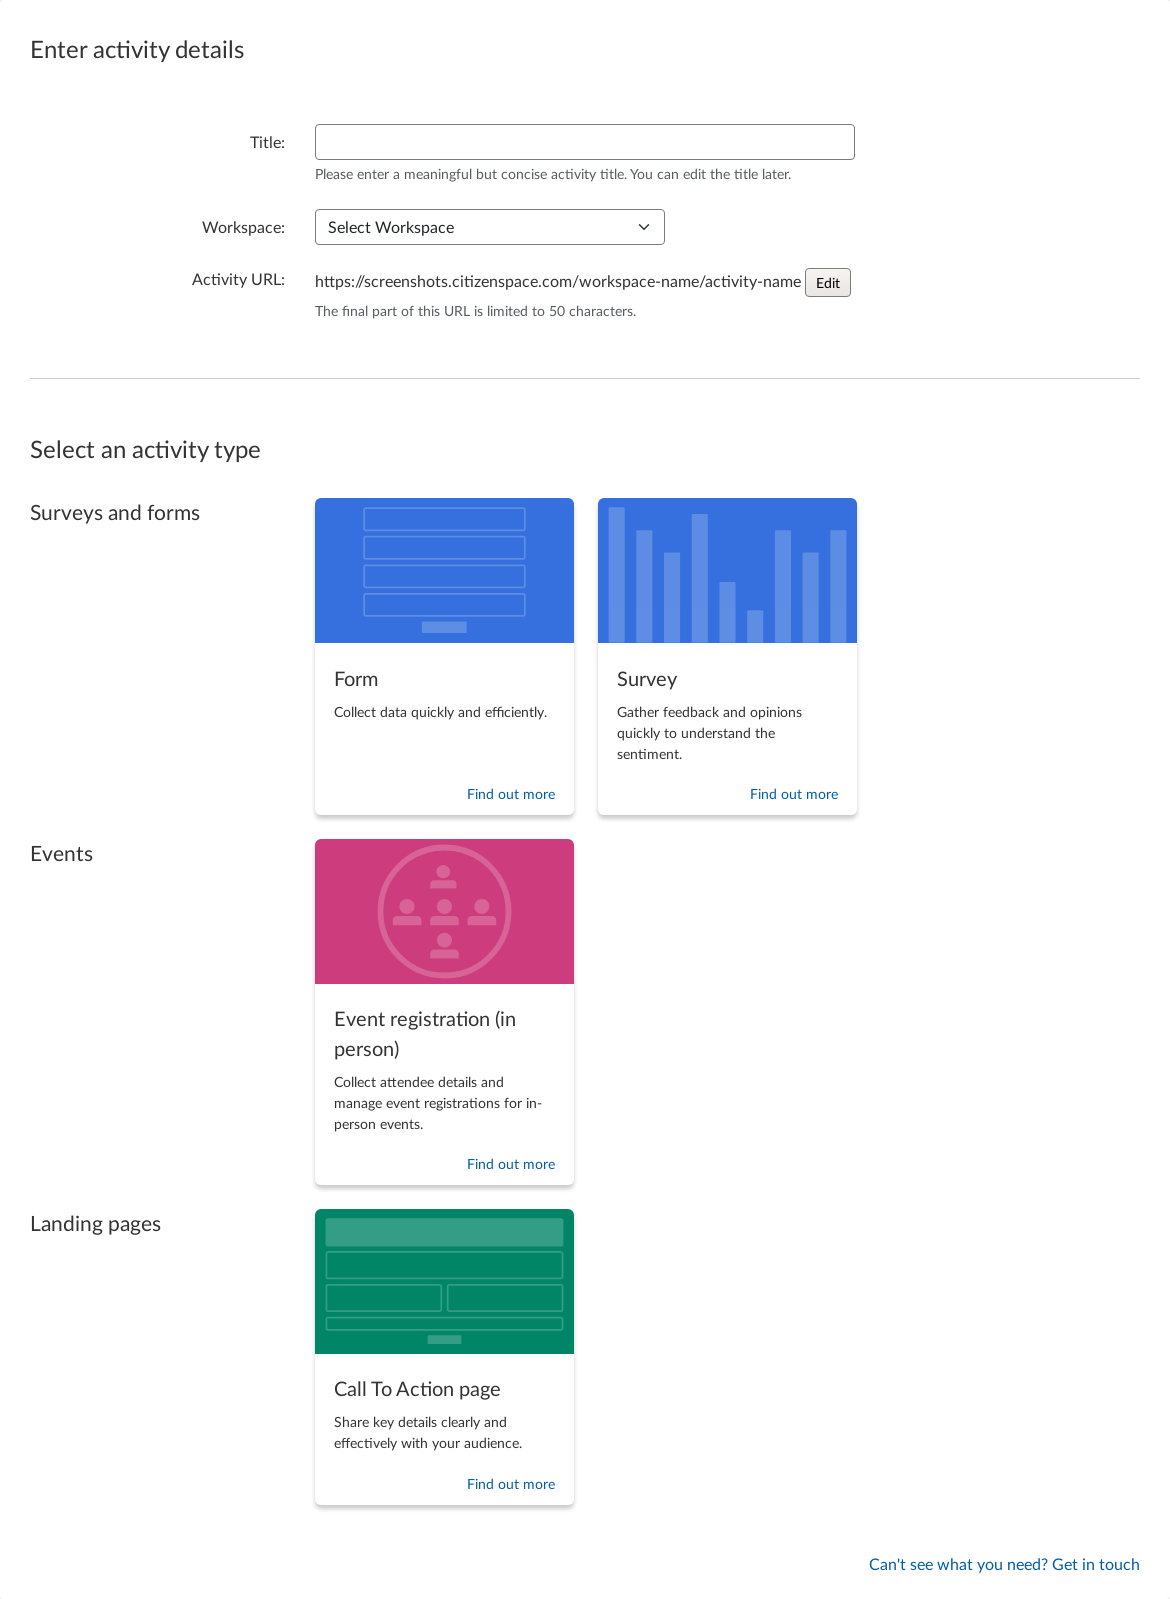
From ‘Manage activities’ page, select ‘Add Activity’.

- Enter the title.
- Select the relevant Workspace from the dropdown menu. You will only be able to add activities to those Workspace you have been assigned or have permission to.
- Select the type of activity.
- Then select ‘Add activity’.

You can quickly access a list of all activities within a Workspace by going to Site > Settings > Workspaces, and then selecting the number of activities link under the relevant Workspace.
Change an activity to a different Workspace
- Go to the activity you created.
-
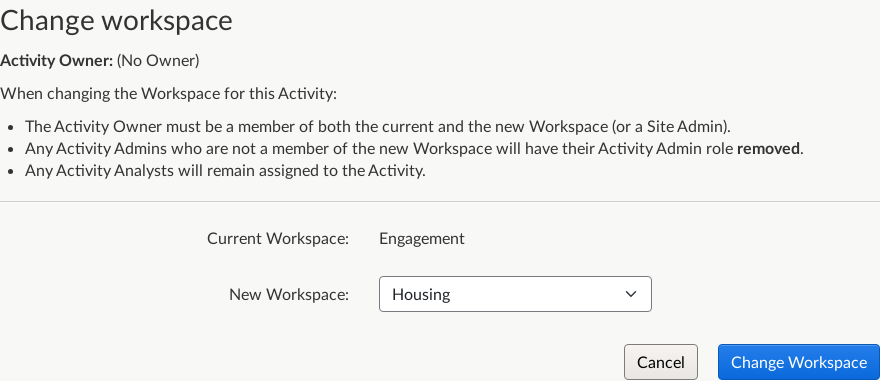
On the activity's Dashboard, go to the Workspace section and select ‘Change Workspace’.

-
Select a different workspace from the dropdown list.

- Select ‘Change Workspace’ to save.
There are things to be aware prior to changing an activity's Workspace.
- Only Site Admins can change an activity's Workspace
- The Activity Owner must be a member of both the current and the new Workspace (or a Site Admin).
- Any Activity Admins who are not a member of the new Workspace will have their Activity Admin role removed.
- Any Activity Analysts will remain assigned to the Activity.
.png)
