Internal users - how to add and manage users
Only Site Admins are able to add and manage users on your Citizen Space site.
How to add users
Select the 'Site' dropdown from the dark grey admin navigation bar across the top of the page and then select 'Settings'.

This will take you to the 'Site settings' section, where you'll see that the page for managing users is the first page you come to.

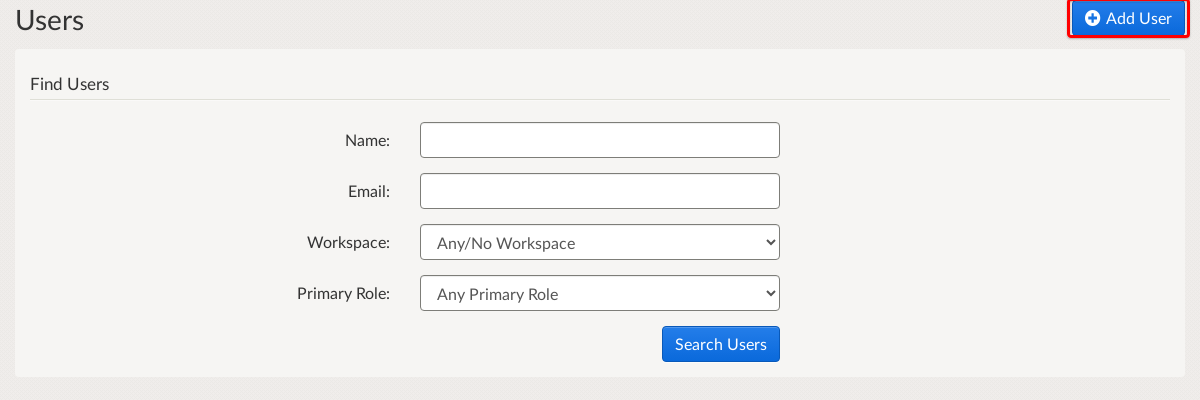
On this page you'll see a list of current users. The list can filtered by Workspace, Primary Role or by name or email to help you find the right profile if you have a long list of users.
There is also a link for adding new users.
Once you have selected Add User, on the next screen you will see the Add User form to complete:
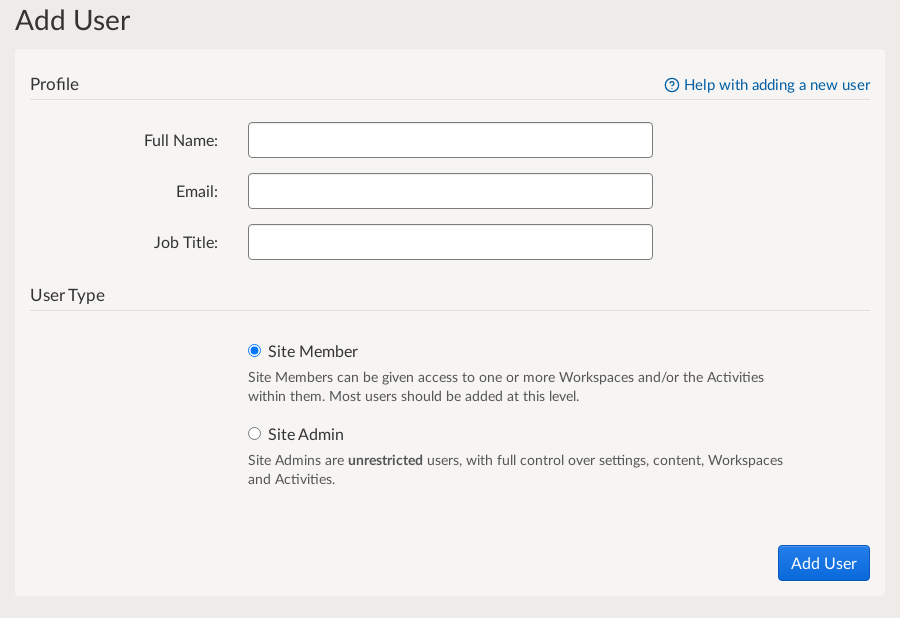
- You must fill in all the sections of this form including full name, email address and job title.
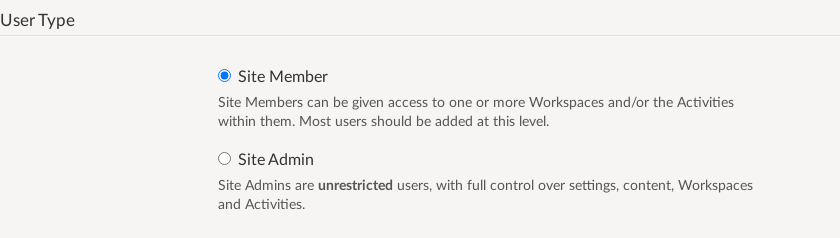
- You must select the user type: either Site Member or Site Admin.
- Site Member: can be given access to one or more Workspaces and/or the Activities within them. Most users should be added at this level.
- Site Admin: unrestricted user, with full control over settings, content, Workspaces and Activities.
Once you complete the form and select 'Add user', you will be taken to the user's profile page with an account summary so you can perform other actions including adding additional contact details or managing their access to Workspaces.
Send account setup email so new user can set their password
From the user's profile screen you also trigger an account setup email.
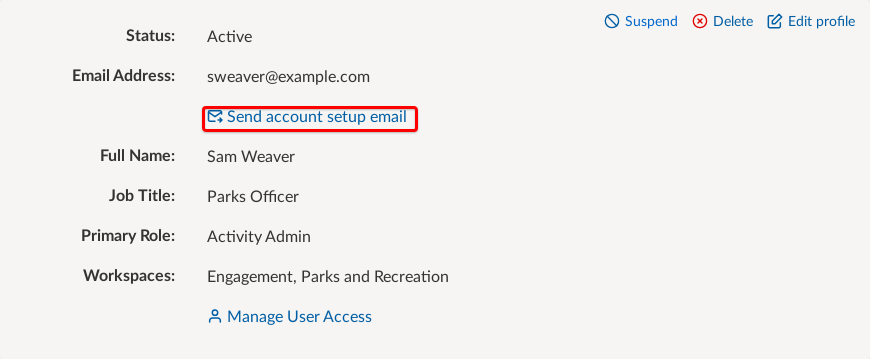
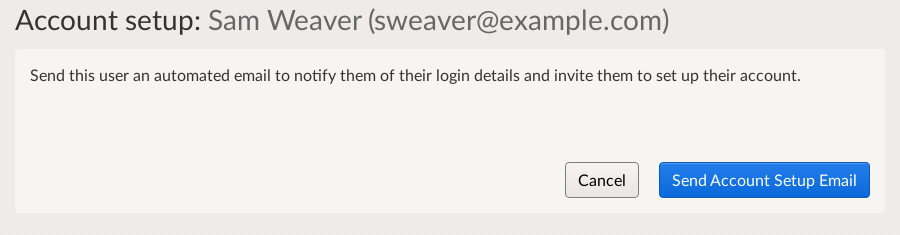
Select the 'Send account setup email' link to be taken to a page to send an automated email to notify them of their login details and invite them to complete setting up their account.
Account setup email
The account setup email message states:
You have been given an account at 'Citizen Space site name'.
Your login email/username is: user's email address
You will need to set up a password by visiting this link and entering your login email:
http://www.citizenspace.com/demo/passwordreset/7d159e3123////dce882a0f0c27a92
Please note: this account setup link will expire in 3 days on [Date], [Time].
After this time you can request a new link at: http://www.citizenspace.com/demo/passwordreset/forgotten_password
Managing users
In this article you can also view information about:
- Assign a user to a Workspace
- Adding a user as an Analyst only
- Changing the User Type of a user
- Suspending and reinstating users
- Changing a user's role in a Workspace
- Remove user from a Workspace
Assign a user to a Workspace
- Go to Site > Settings.
- Select Users.
- Once on the users page, find and select the user.
- From the user’s profile, select Manage User Access.
- Select Add User to Workspace.
- From the dropdown menu, select the relevant Workspace.
- Set the user as either a Workspace Member or Admin and then select Assign.
- Repeat steps 5-7 to assign the user to additional Workspaces.
Adding a user as an Analyst only
Follow the instructions above to add a new user as a Site Member, but do not assign any Workspace roles. This will mean that your new user will only be able to analyse the individual activities to which they are assigned and cannot create their own activities.
If response publishing is enabled on your Citizen Space site, analysts will also be able to moderate responses for the activities to which they are assigned.
Find out how to assign users as analysts to activities.
Changing the User Type of a user
On each user's profile, you will find the Edit Profile button in the top right hand corner to edit their profile in order to change any of their details such as name, job title, email address, contact details or user type.
To change their User Type (either Site Admin or Site Member), select the appropriate type and save.
You can learn about the different types of users and their permissions.
Suspending and reinstating users
On each user's profile, you will find the Suspend button in the top right hand corner to suspend them from using Citizen Space.
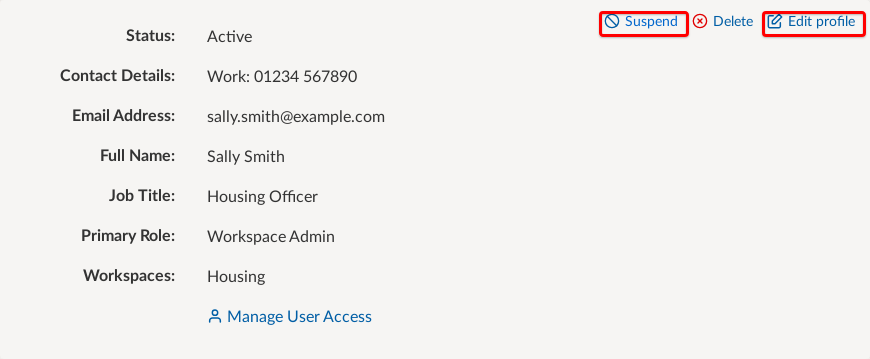
Once a user has been suspended, they will no longer be able to log into Citizen Space. In their user profile, the 'Suspend' button will be replaced by a button that you can use to reinstate their account if need be.
Change a user's role in a Workspace
- Go to Site > Settings.
- On the Users page, go to the user’s profile.
- Select Manage User Access.
- In Workspaces section, select Add User to Workspace.
-
Select the appropriate Workspace from the dropdown menu.
Note: They will already appear to belong to the workspace in the table for which you will be selecting.
- Set the updated user’s role for that particular Workspace:
- Workspace Member: Workspace Members can view all workspace activities and create new ones.
- Workspace Admin: Workspace Admins can manage workspace permissions, edit all workspace activities and create new ones.
- Select Assign.
Remove user from a Workspace
When editing a user's profile, it is also possible to remove users from their assigned Workspaces. However, it is important to be aware that when a user cannot be removed from a Workspace if they own activities in that Workspace. If a user needs to be removed from a Workspace and they own activities, you must first change the owner for each of those activities to another user that belongs to that particular Workspace.
- Go to Site > Settings.
- On the Users page, go to the user’s profile.
- Select Manage User Access.
- To remove the user, select Remove from under the Actions column from the appropriate Workspace in the table.
If a user was an Activity Admin (not the Owner) for an activity in the Workspace you're removing them from, they will no longer have access to those activities. They will however remain assigned to any activities to which they are an Activity Analyst.
It is not currently possible to move activities or users in bulk. Each action will need to be done on an individual activity or user basis.